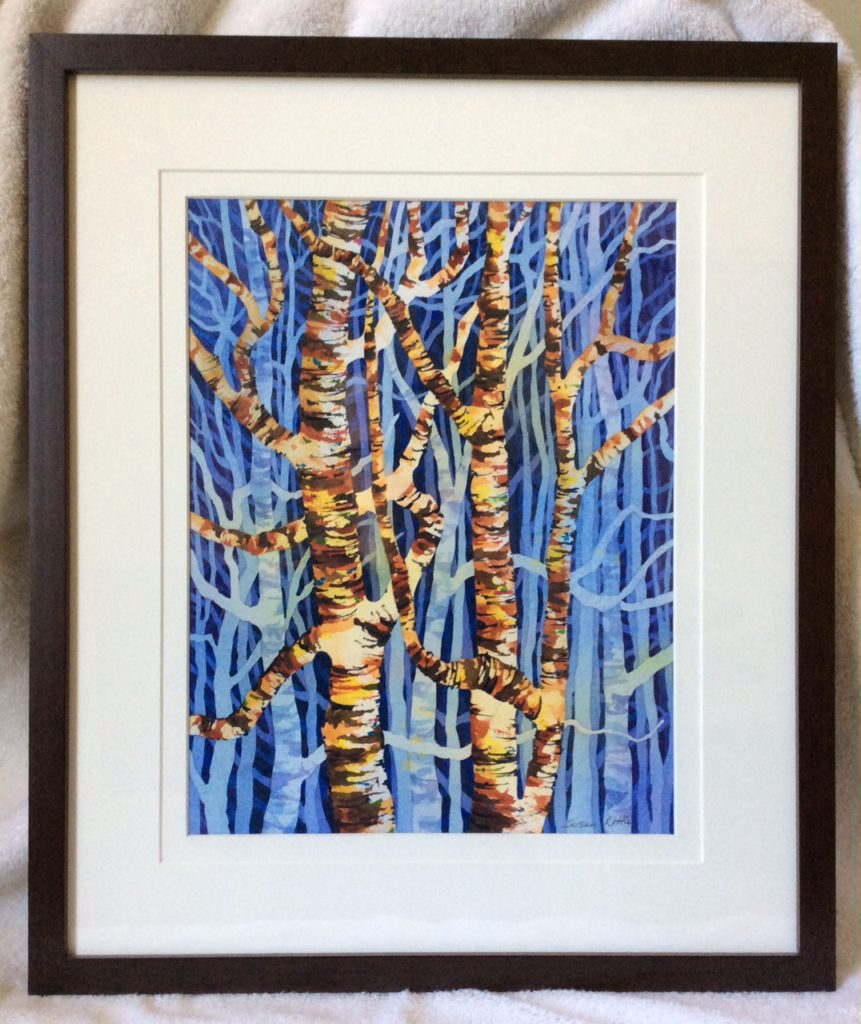
Creating an illusion of depth when painting in watercolours can be tricky. But it’s worth the time and effort to apply this clever method of negative painting technique to build up contrast and to make your artwork pop! This technique actually gets easier as you work through the various layers of paint. I love using negative painting when I am creating a stylized deep forest scene. I begin with some pale coloured washes of aureolin yellow and permanent rose dropped onto my wet watercolour paper to soften the stark white colour. I let the dropped in colours meet and roll around as I tip my paper to help spread them out. Once that is dry I apply the first layer of this technique. It’s called negative painting because you are actually filling in the space around the object, not the object itself. The trees are ‘positive’ objects and the spaces in between them are considered ‘negative’.


As you can see above in the top left photo are the results of my first layer. You must aways start with a light layer of colour, I chose cobalt blue. This is because each succeeding layer of paint will be darker and more intense than the first so you don’t want to get too dark too quickly or you won’t have anyplace to go. The first image shows that the actual trees are untouched other than the background colour showing through. I have drawn very light pencil lines of how I want my initial tree shapes to look.
I then go about carefully painting in the negative spaces between the trees to delineate them. It looks as though I am using a stencil or a resist technique to get these shapes but no, I just make sure I am always painting on a dry surface so that I can get nice crisp edges. I try to keep my trunks and branches bumpy and bent to give my forest an organic feel. I let this layer completely dry then subdivide those painted negative shapes to indicate the next layer of trees. I had made a large puddle of cobalt blue paint to work from for my first layer and will use the same puddle of paint for my second layer. It will appear darker because there are 2 layers overtop of each other. As I proceed with the next layers to create more distant trees I begin to add more and more ultramarine blue to my puddle of cobalt to darken it. In my final layer I create an almost black dark colour mixing cobalt blue , ultramarine blue and burnt umber.
The beauty of using cool colours for the background trees is that the warm colours in the front trees really sing. Colour theory dictates that cool colours recede and warm colours come forward and as you can see they really do! To create my bark textures I painted those golds and browns in layers. Starting with laying down yellow ochre, then burnt sienna, then burnt umber and then a mix of burnt umber and ultramarine blue. I used a palette knife to drag the colours across the tree trunks and branches to create the look of bark. There is nothing negative to say about this painting technique I positively love the results and my painting ‘Woods In Blue‘.
To see this finished watercolour painting ‘Woods In Blue’ close up and for more of my paintings please go to my original art watercolour and acrylic galleries on this website.